
Communication Between PCs in Packet Tracer
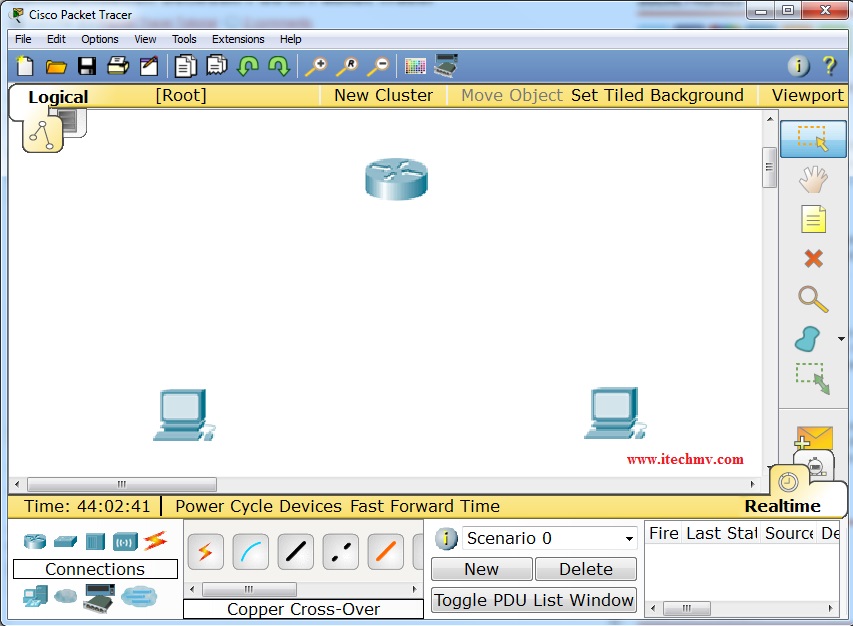
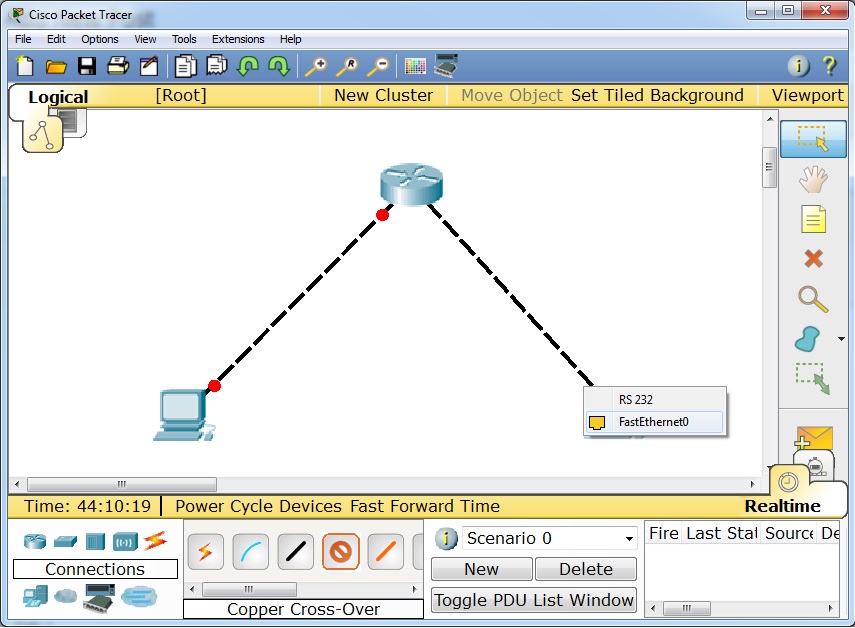
Here, we will see communication enabled between PCs via Router in Packet Tracer. So, for this we need two PCs, a router ,and two cross over cables to connect them. Important point is that we use cross over cable to connect PC to a router because they both use the same pins for transmission and receiving of data.
Now, we will connect them by selecting fast Ethernet interfaces on both ends.

Similarly, on the PC side we will select fast Ethernet interface.
Now, we have connect the devices. Further, we will go to the router CLI mode and enter the following commands.
Step by step , we will have to do the following things.
- Access the interfaces one by one
- Assign IP addresses to interfaces
- Change the status of the interfaces i.e. from Down to Up.
- Assign IP addresses to PCs.
- Assign Default GateWay to PCs. FYI fast ethernet ip address is the gateway address to the PC.
Now, commands of the Router CLI mode are as follows.
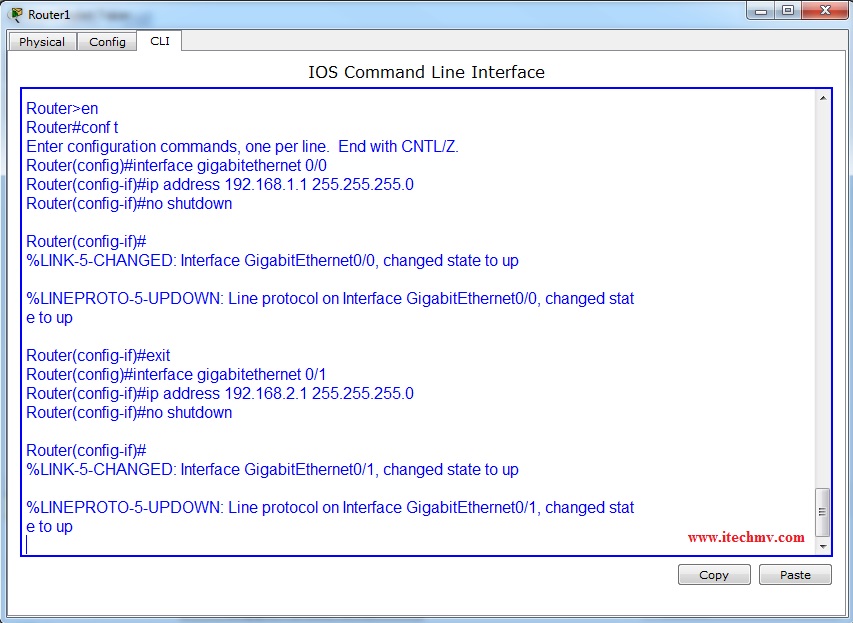
Now, we have accessed both interfaces one by one and we have assigned IP addresses respectively.
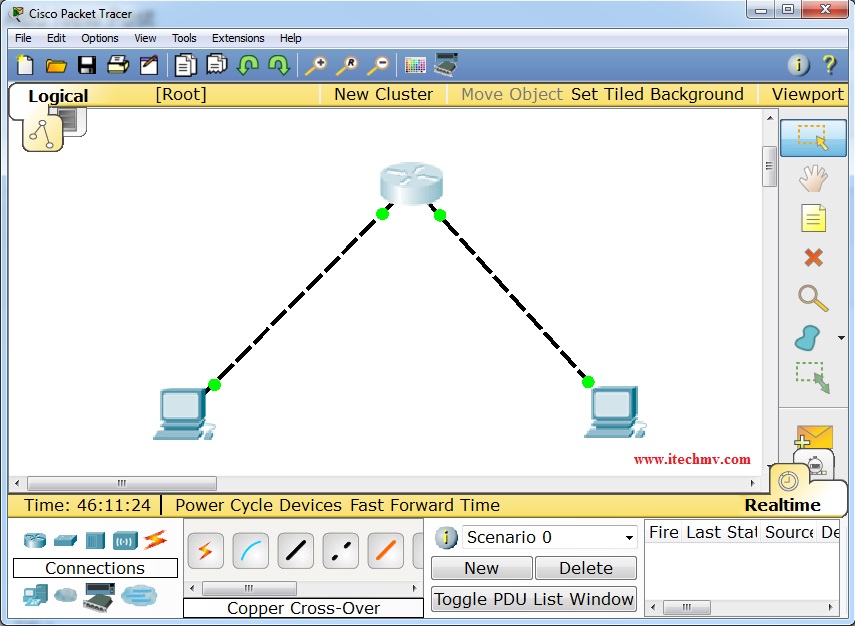
See the difference the lights have changed the color from Red to Green.
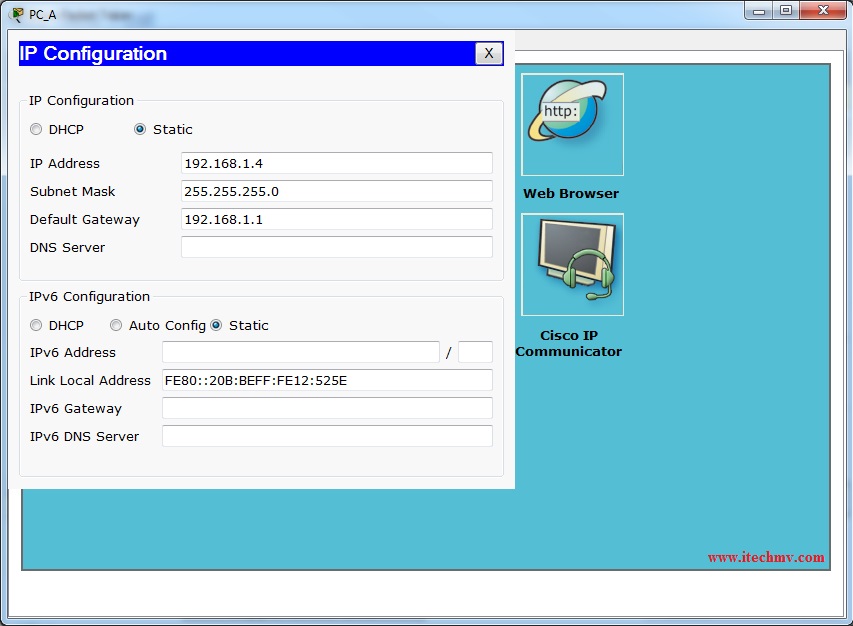
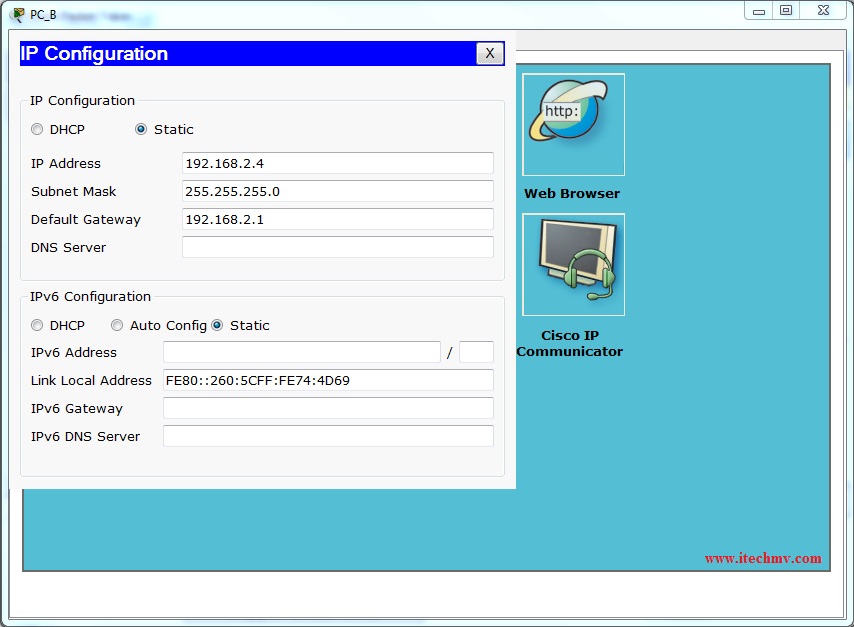
Now, lets assign IP addresses to the PCs.
Click on PC_A, go to Desktop, then click IP Configuration.
PC_A
PC_B
Now, our communication is enabled and we are able to communicate from PC_A to PC_B via Router.
Click on the packet in the right panel on the packet tracer, then click on PC_B and then click on PC_A or PC_A and then click on PC_B
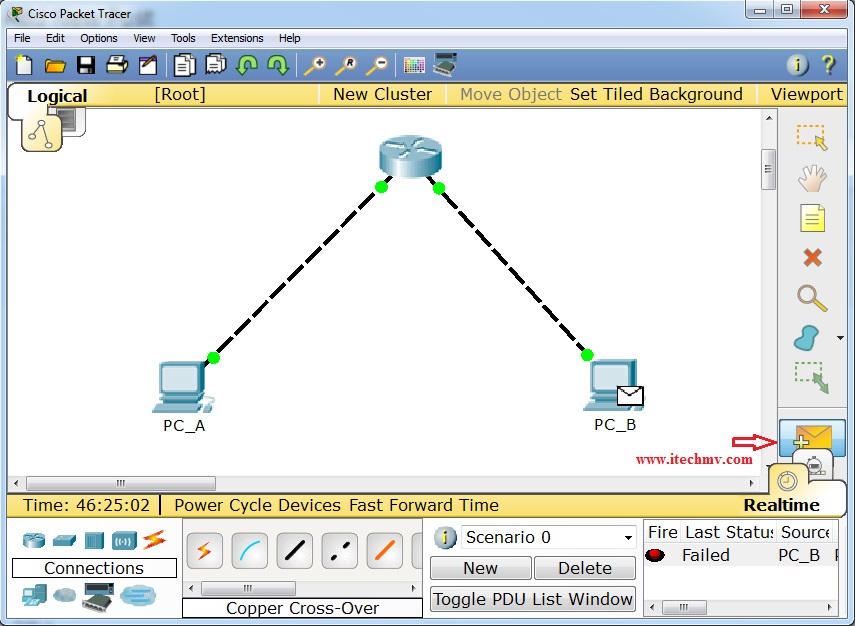
Now you will see the successful packet tracer (status is shown in the bottom right corner)

Thanks, If you like this tutorial please share this article to your friends in FB, Twitter,
Related Posts


About The Author
AYYU
I am a blogger since 2010 and I’m the author of this website I'm a systems/network administrator and I enjoy solving complex problems and learning as much as I can about new technologies. I write tutorials based on my work experience and other IT stuff I find interesting. since 2006 in online world also I am a troubleshooter for the well-known website like http://www.fixya.com and many more groups
wow so cool, what big large help