
Enabling Hyper-V for use on Windows 8.1
Virtual Machines are great for running different operating systems or software configurations on a single machine and many other additional tasks. The launch of the Windows 8 offering was the first Windows client operating system to include hardware virtualization support without the need for separate installs or downloads. The Hyper-V client found in Windows 8 is the same technology used in Windows Server 2012 Hyper-V allowing IT professionals to move VMs from server to client without the requirement to re-learn the use of Hyper-V features and tools.
In Windows 8.1 further enhancements to the Client Hyper-V were introduced. The most notable update called Enhanced Session Mode enables high fidelity graphics for connections to VM’s using the RDP protocol. In addition USB redirection is also enabled from the host to VM’s.
Step 1: Prerequisites
The following prerequisites are required to successfully run Client Hyper-V on Windows 8.1:
- Windows 8 Pro or Enterprise 64 bit Operating System
- 64 bit processor with Second Level Address Translation (SLAT)
- 4GB system RAM at minimum
- BIOS-level Hardware Virtualization support
Step 2: Setting Up Hyper-V
- Ensure that hardware virtualization support is turned on in the BIOS settings.
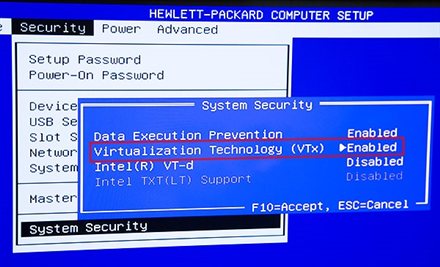
- Save the BIOS settings and boot up the machine normally,
- At the Start Screen, swipe the right hand side of the screen and select the Search Charm.
- Type turn windows features on or off and select that item
- Select and enable Hyper-V

- If Hyper-V was not previously enabled, reboot the machine to apply the change.NOTE: As a best practice, it’s a good idea to configure networking for the Hyper-V environment to support external network connections. Ensure that a virtual switch has been created and is functional.
- Open the Virtual Switch Manager, found on the Actions panel in the Hyper-V Manager, by typing Hyper-V at the Start Screen.
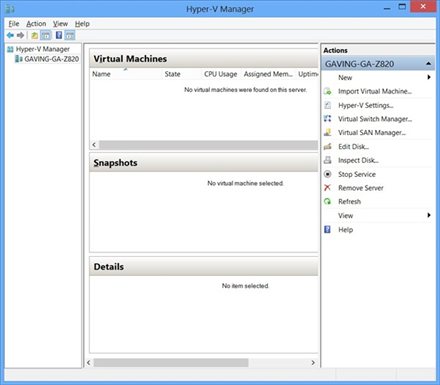
- Select “Virtual Switch Manager” in the Actions pane.
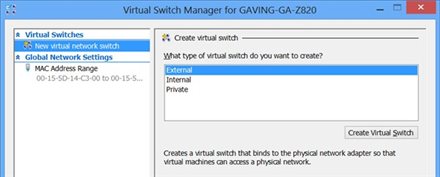
- Ensure that “External” is highlighted, and then click on the “Create Virtual Switch” button.
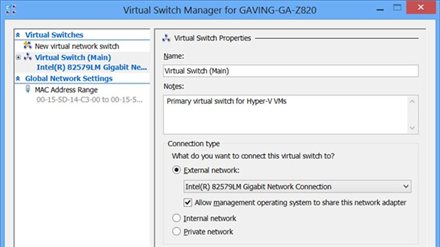
- If more than one NIC in is present, ensure that the proper NIC is selected for use on the VM external network connections.
NOTE: There are a great deal of other options and features that can be configure. This Step-By-Step provides a good starting point and is all that is needed to start creating and using VMs on Window 8 Pro.
Reference from : http://blogs.technet.com/
Related Posts


About The Author
AYYU
I am a blogger since 2010 and I’m the author of this website I'm a systems/network administrator and I enjoy solving complex problems and learning as much as I can about new technologies. I write tutorials based on my work experience and other IT stuff I find interesting. since 2006 in online world also I am a troubleshooter for the well-known website like http://www.fixya.com and many more groups