
EXCEL 2016 interface Chapter 3
EXCEL 2016 interface: Quick Access Toolbar
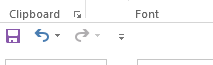
In EXCEL 2016 interface Quick Access Toolbar was created to give users easy access to frequently used options and features. It is located above the ribbon, and like the ribbon, it can also be adjusted to your preferences.

Changing the position of the Quick Access Toolbar
By default, the toolbar is located above the ribbon. If you want to change its position and move it below, click the Customize Quick Access Toolbar button (it is located to the right of the toolbar) and choose Show Below the Ribbon.
If you want to restore the Quick Access Toolbar to its original position, select Show Above the Ribbon.
Selecting additional options in EXCEL 2016 interface
After you click the Customize Quick Access Toolbar button, the menu with the list of several different items will appear. Some of them are selected by default (you can unselect them). These are Save, Undo, and Redo. If you want to add additional options, just click one of them, and the new icon will appear in the Quick Access Toolbar.
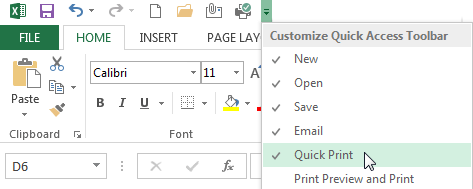
If you want to add some additional options that are not present on the list, click the More Commands position, which is located at the bottom of the menu.
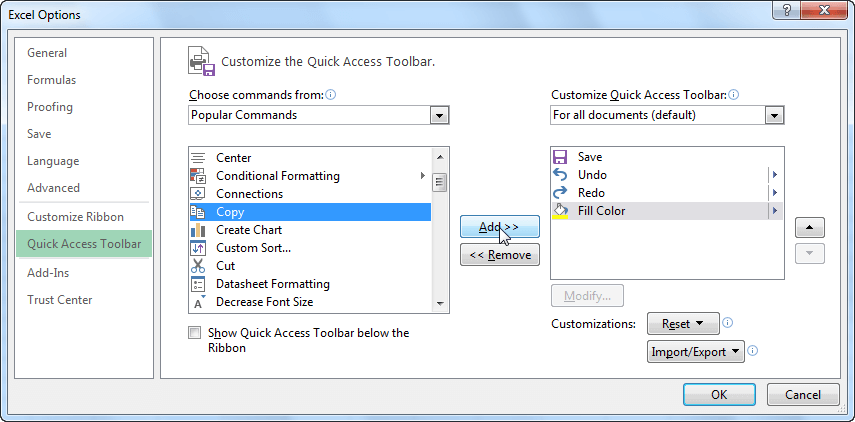
From the menu to the left, click one of the buttons, then click Add. When you click OK, the new items will appear in the toolbar.
Removing unnecessary icons
To get rid of the icon from the toolbar, right-click it and from the drop-down menu, select Remove from Quick Access Toolbar.
EXCEL 2016 interface : Formula Bar
The formula bar is located between the ribbon and the workspace. When you click any cell in the worksheet, Excel will display contents of the cell inside the formula bar and its address in the Name Box that is located to the left.
You can enter or edit the formula in the formula bar, as well as directly in a cell.
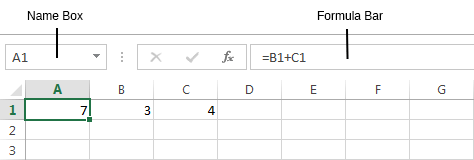
Between the Name Box and the Formula Bar, you will find three icons.
- The first icon is called Cancel. Click it if you want to finish editing the cell. It’s an equivalent of the Esc key.
- The second icon is Enter. It works the same way as the Enter from the keyboard. It is used to accept changes inside a cell.
- The third icon is called Insert Function. When you click it, a window with the list of functions to choose will appear.
Visibility of the Formula Bar
If you want to hide or display the formula bar, you can do it in VIEW >> Show >> Formula Bar.
EXCEL 2016 interface : Status Bar
The status bar is located at the bottom of the screen, below the working area. It displays information about the current activities in the worksheet.

The left side of the Status Bar
The first thing that stands out when you look at the Status Bar is the word READY. It will be present most of the time when you work with Excel.
As soon as you start typing in a cell, it will change to the ENTER. Double-click the cell containing a value, and the text will change to EDIT.
Next to it, you will find the Macro Recorder. It is used to create macros that will allow you to automate your tasks.
The right side of the Status Bar
On the right side, you will find three icons. With these icons, you can adjust the way your sheet will be displayed. The default mode is set to normal.
Next, to the right, there is a slider. It allows you to zoom the working area. By default, it is set to 100%. Click this value and a new window will appear. You can choose one of the following options:
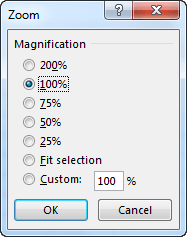
- Default zoom values (25%, 50%, 75%, 100%, 200%).
- Adjust the view to the selected cells. Up to 400%.
- Enter the specific value between 10% and 400%.
Additional options
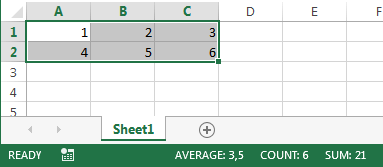
If you select a group of cells that contain numbers, Excel will print additional information, such as Average, Count, and Sum.
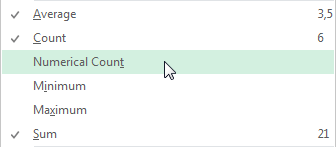
In order to have a quick preview of additional information, right-click the status bar and choose one of the three options: Numerical Count, Minimum and Maximum.
NOTICE
If you select multiple cells, and none of them will be a number, Excel will return information only about Counter.
EXCEL 2016 interface : Backstage View
The backstage view is a place where you can perform operations on the file.
The backstage view was first introduced in Excel 2010 and is still present in Excel 2013. In earlier releases, including Excel 2003, many features from the backstage view were present under the File button.
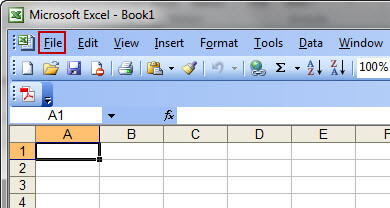
In Excel 2007 for the first and last time, you could find these options under the Office button that was located in the upper left corner.
Backstage View in Excel 2013 or EXCEL 2016 interface
If you want to display the backstage view in Excel 2013, you need to click the FILE tab. After you do this the backstage view will appear.
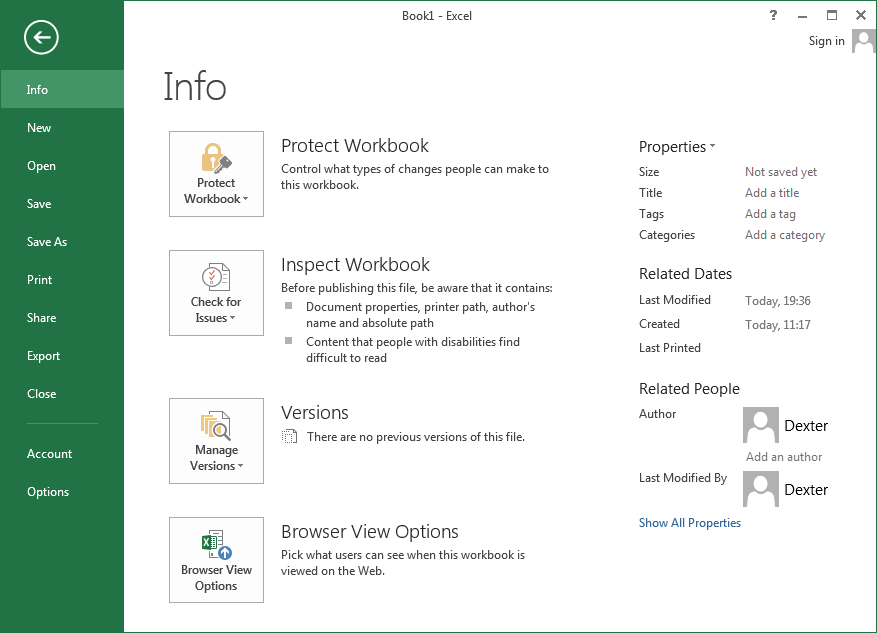
On the left side, you will find a green area with menu items. If you click one of them, options that are related to the selected category will appear on the right side of the screen.
TIP
If you want to return to your spreadsheet, click on the arrow in the upper left corner or press the ESC key.
Info
Here, you will find a variety of information about the file and a list of backup files of the currently opened document.
New
In this category, you can create a new file. It can be a blank sheet or one of the many available templates.
Open
This category contains a list of recently opened workbooks. Additionally, you can load a file from a disk or cloud services.
Save / Save As
Here, you can save a file in the cloud or on your hard drive.
Under this button, there are options that will let you adjust the document parameters. You can set margins, scaling, orientation, the number of copies or choose one of the available printers. On the right side you will find a preview of the currently edited spreadsheet, so you can know exactly how it will look like after you print it on paper.
Share
Under this tab, you can share your documents with other users.
Export
If you want to change a workbook’s file type, for example to an xls extension (Excel 97 – 2003 format) or save the file as PDF, you can do it here.
Account
Choose this button if you want to log into Excel.
Options
Click on this position and a new window with many different options will appear. Here, you can customize a lot of Excel features.
I have written all about EXCEL 2016 interface. In next tutorial i will Write about Basics of excel 2016 like Entering and editing, Data Types, data and Copy, cut and paste data. Hope that it helps for you guys.
Related Posts


About The Author
AYYU
I am a blogger since 2010 and I’m the author of this website I'm a systems/network administrator and I enjoy solving complex problems and learning as much as I can about new technologies. I write tutorials based on my work experience and other IT stuff I find interesting. since 2006 in online world also I am a troubleshooter for the well-known website like http://www.fixya.com and many more groups