
HOW TO ADD SIGNATURE TO MS OUTLOOK
Microsoft Outlook is a personal information manager from Microsoft, available as a part of the Microsoft Office suite. Although often used mainly as an email application, it also includes a calendar, task manager, contact manager, note taking, journal, and web browsing.
It can be used as a stand-alone application, or can work with Microsoft Exchange Server and Microsoft SharePoint Server for multiple users in an organization, such as shared mailboxes and calendars, Exchange public folders, SharePoint lists, and meeting schedules. Microsoft has also released mobile applications for most mobile platforms, including iOS and Android. Developers can also create their own custom software that works with Outlook and Office components using Microsoft Visual Studio. In addition, Windows Mobile devices can synchronize almost all Outlook data to Outlook Mobile.
Today I am going to tell you all to create personalized signatures for your email messages that include text, images, your electronic business card, a logo, or even an image of your handwritten signature. You can set it up so that signatures can be added automatically to all outgoing messages, or you can choose which messages include a signature.
Follow this steps:
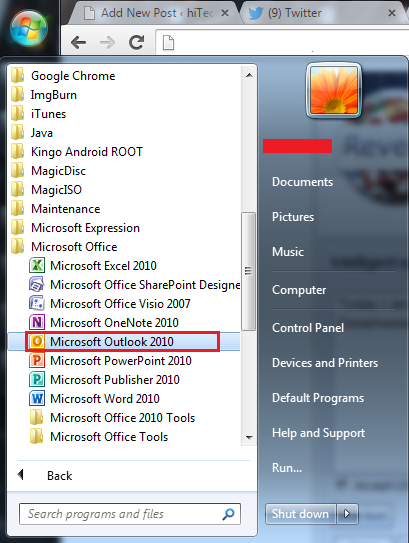
Step 1 In Outlook 2010, open a new message by clicking on the New E-mail button.
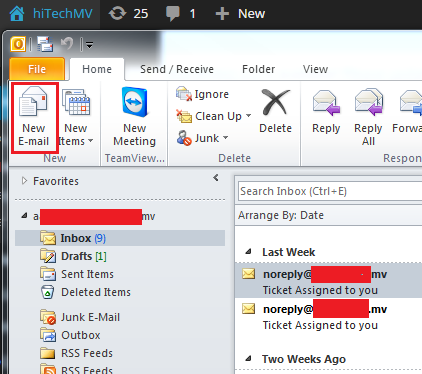
Step 2 On the Message tab, click Signature (in the Include group) and then click Signatures…

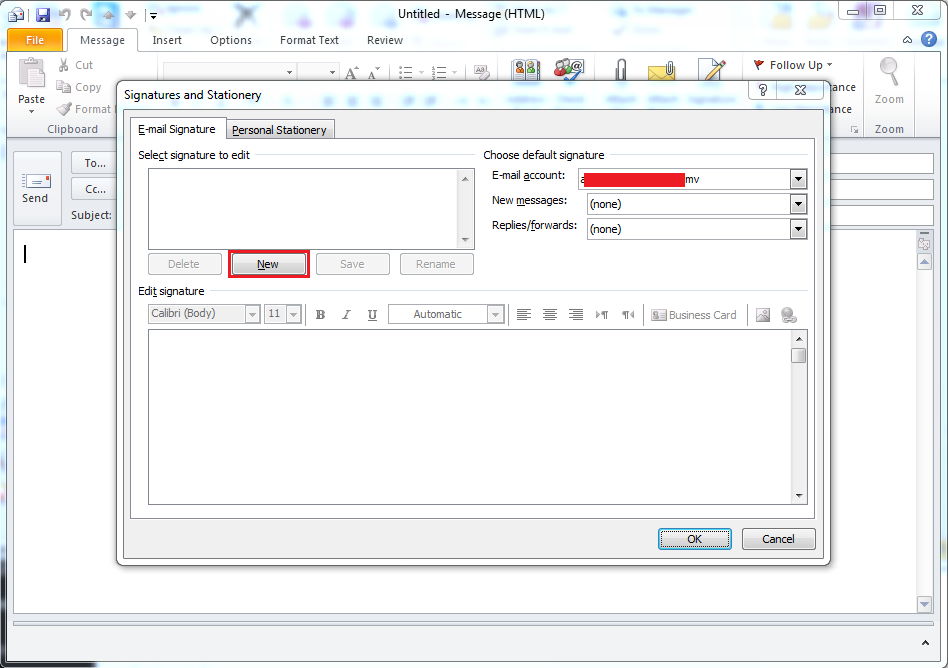
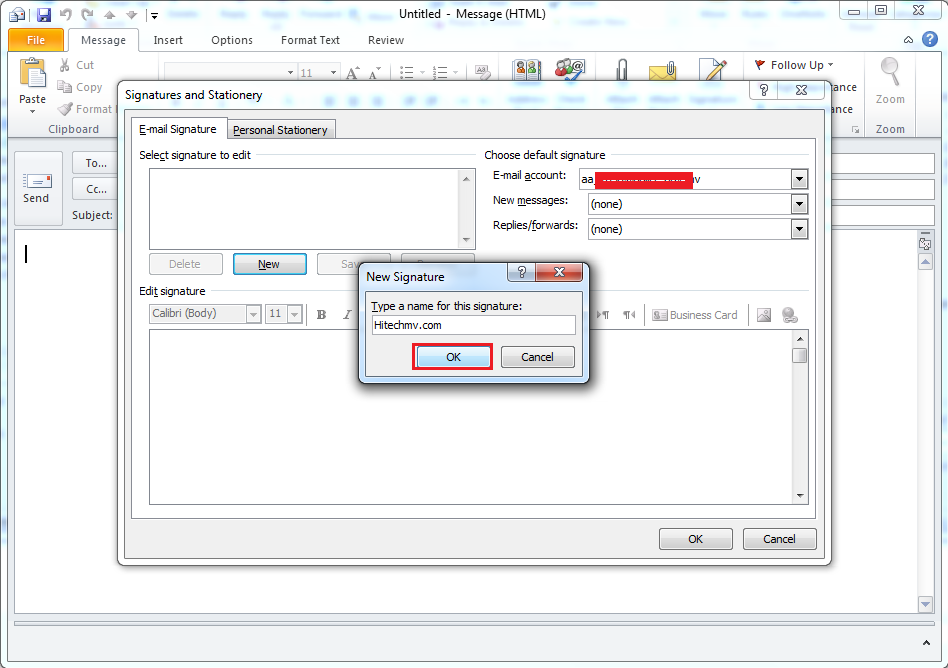
Step 3 On the E-mail Signature tab, click New. Type a name for this signature and click OK.
Step 4 Click on your new signature title to highlight it and then in the Edit signature box, type the signature that you want to use. At this stage, you can use the text editing options at the top of this box to change fonts, alignments, font size etc… to format and style your signature text.
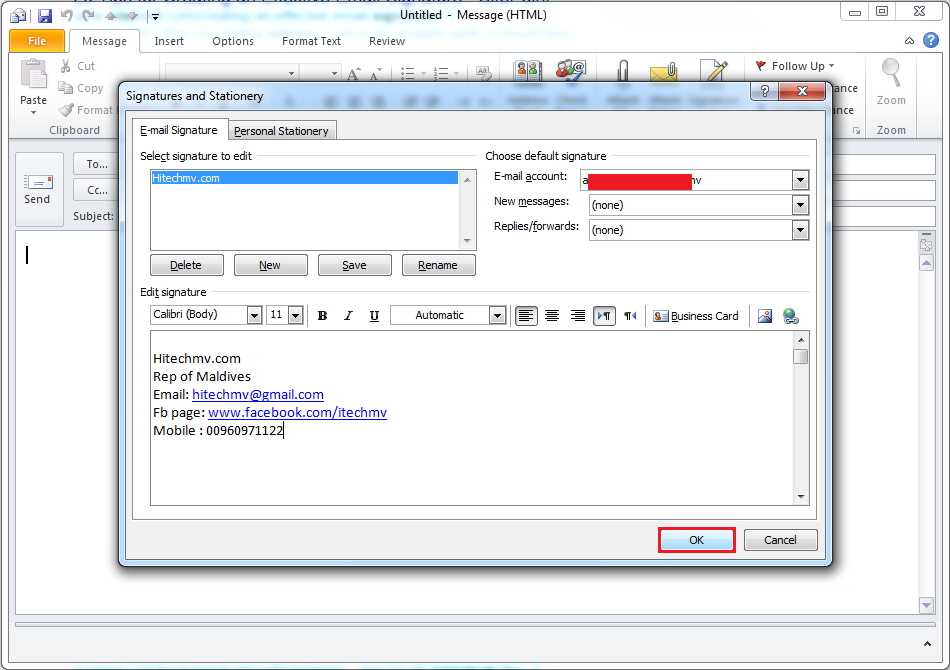
Step 5 When you are finished creating your signature, click ok.
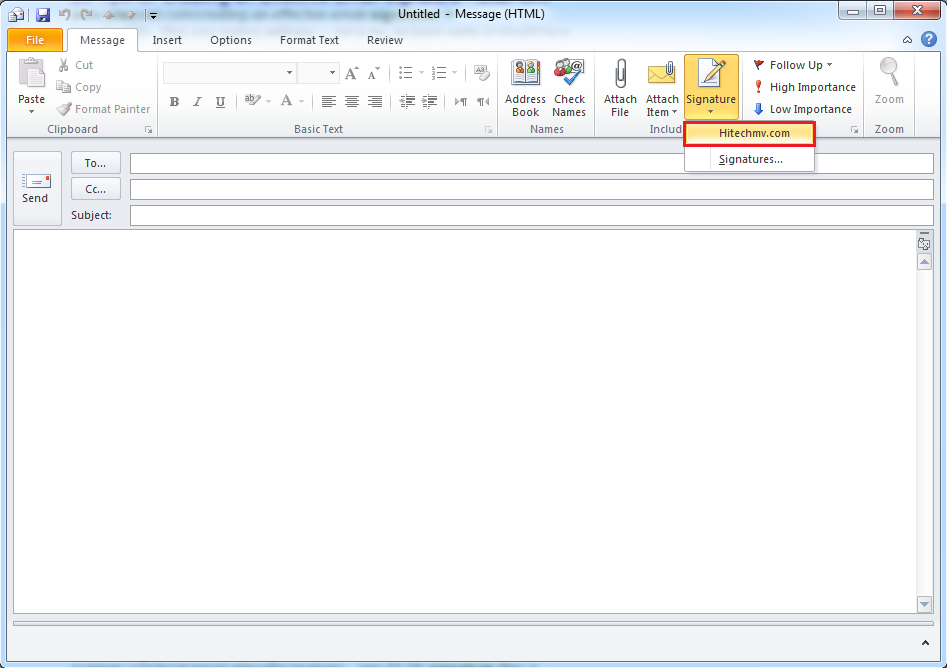
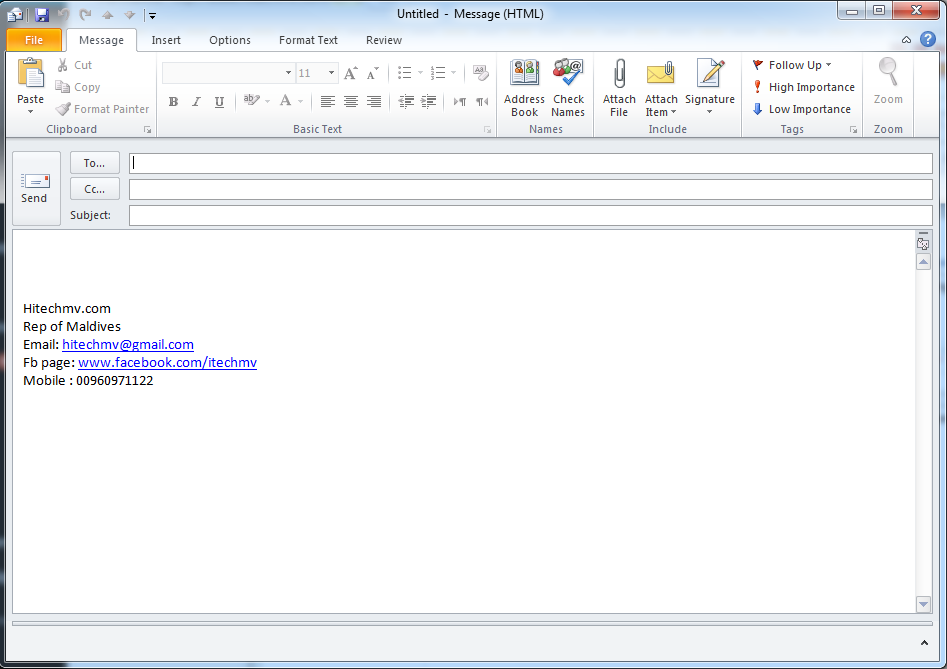
You can now include this signature manually when sending an email by clicking on Signature and choosing the title of the signature to include. If you would like to set your signature to automatically appear in every message, please continue to the next step.
Step 6 In the Message tab, click Signature and then click Signature that i created above (Hitechmv.com)
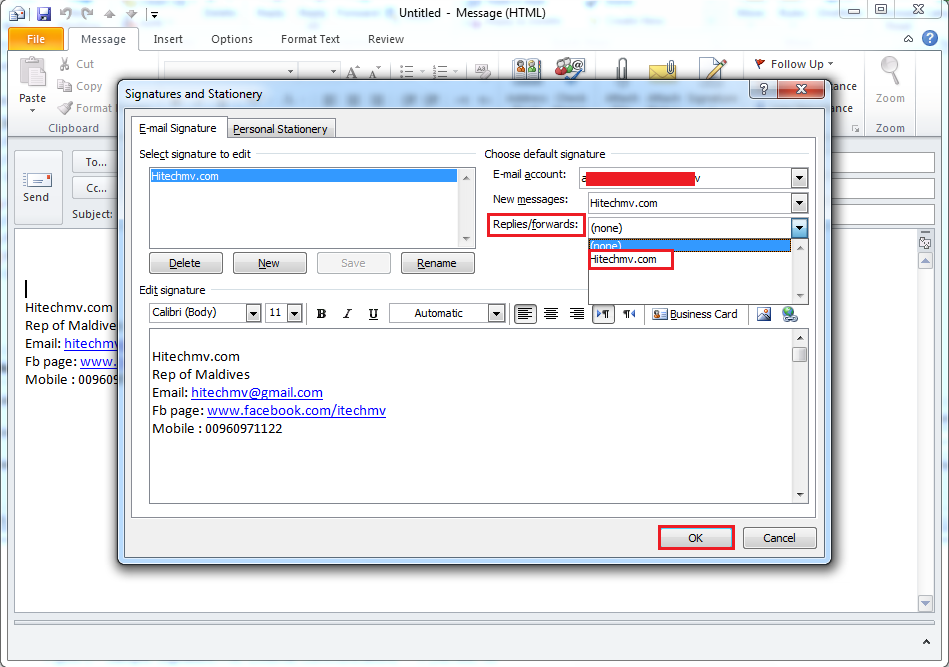
Step 7 Under Choose a default signature (in the E-mail Signature tab), in the E-mail account : list, choose the email account that you want to set an automatic signature. i am going to select the signature i created above (hitechmv.com) remember after selecting your signature it appears in your message boxes.
Step 8 In the New messages : list, select the signature that you want to include automatically in every new email.
Step 9 If you also want a signature included when you reply to or forward a message, please select the signature in the Replies/forwards: list, otherswise set to (none) than click ok.
Thanks, If you like this tutorial please share this article to your friends in FB, Twitter,
Related Posts


About The Author
AYYU
I am a blogger since 2010 and I’m the author of this website I'm a systems/network administrator and I enjoy solving complex problems and learning as much as I can about new technologies. I write tutorials based on my work experience and other IT stuff I find interesting. since 2006 in online world also I am a troubleshooter for the well-known website like http://www.fixya.com and many more groups