
How to Install Packet Tracer on Linux
Cisco Certified Network Associate certification has become must for anybody who wishes to start a career in networking. This certification validates that you have the ability to install,configure and troubleshoot a network. You need lot of practice for achieving success in this exam. A part from the labs where you are getting trained for CCNA what if you had a chance to practice at home. Or what if you want to self learn for CCNA? Well for both of the questions above, Cisco Packet Tracer is the perfect answer. To quote from Cisco’s official website,Packet tracer is “a powerful network simulation program that allows students to experiment with network behavior and ask “what if” questions.”
It further says,
“The simulation-based learning environment helps students develop 21st century skills such as decision making, creative and critical thinking, and problem solving. Packet Tracer complements the Networking Academy curricula, allowing instructors to easily teach and demonstrate complex technical concepts and networking systems design.”
To install Packet Tracer in Linux, we need a .deb package of Packet tracer which can be downloaded from here. Now I am going to install it in Ubuntu Precise Pangolin (12.04). Download the above file to the desktop.

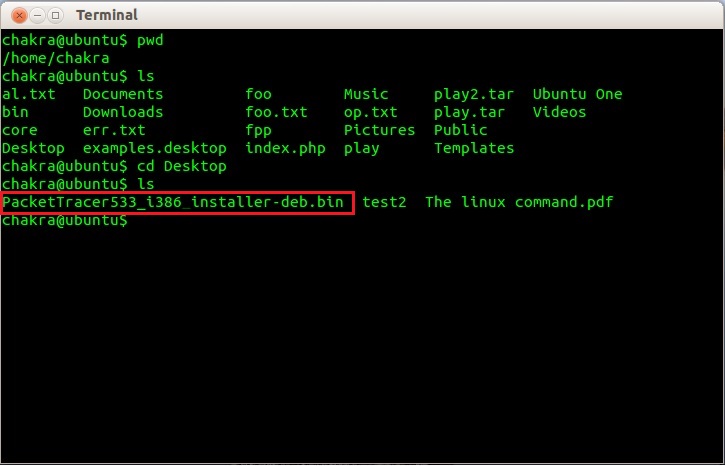
Start the terminal and see your current working directory by typing pwd. If the current directory is not desktop move to the Desktop directory using cd. After reaching the Desktop directory, type ls to see if the packet tracer binary is there.
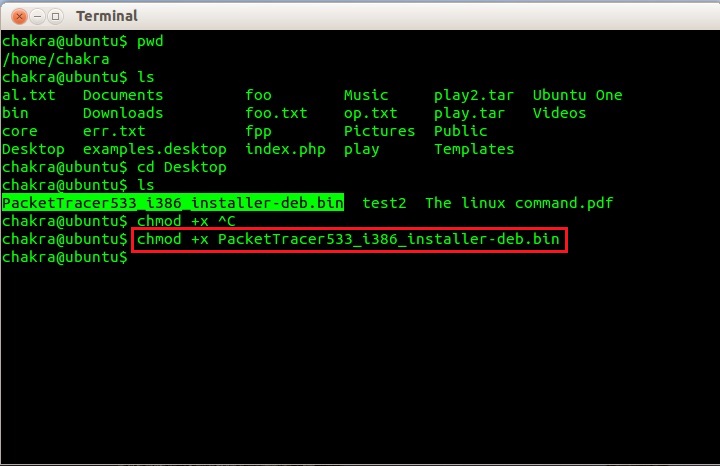
Left click on the packet tracer .bin file displayed after typing ls above,the entire word will be selected. Then right click and select copy. Now type chmod +x and then hit CTRL+SHIFT+V to paste the text we copied above. Our command should look like this.
chmod +x PacketTracer533_i386_installer-deb.bin
What chmod +x command does is that it gives all users permission to execute.
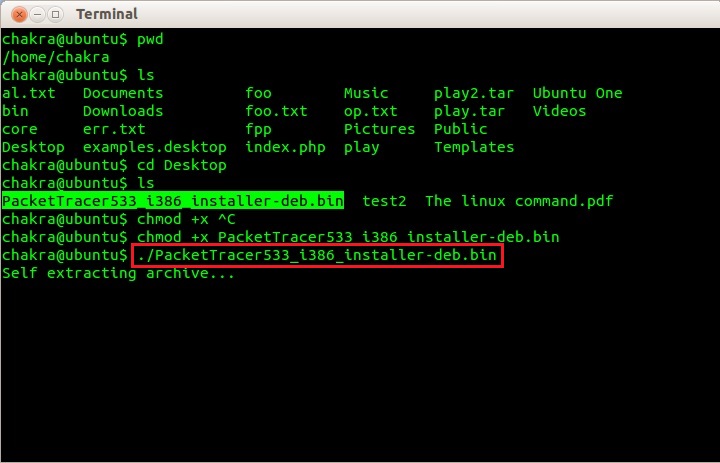
Then type ./PacketTracer533_i386_installer-deb.bin in the terminal.This will start extracting the binary package.
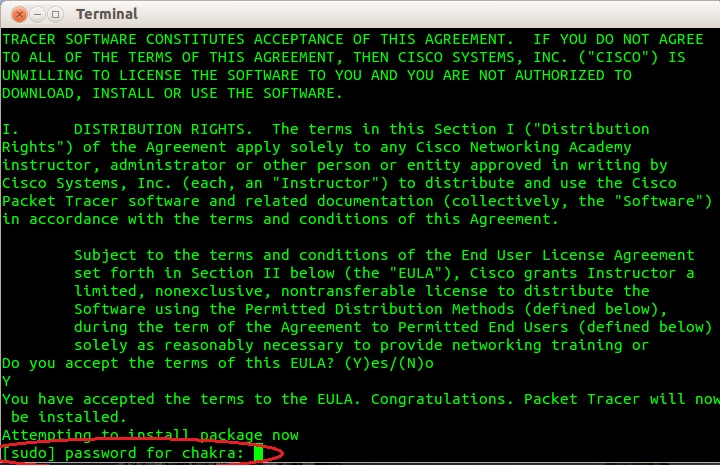
Then terminal prompts us to hit Enter to read the End User License Agreement.Hit Enter.

After displaying a rather long EULA, terminal asks us if we accept the terms of EULA. Type Y.

Then system asks us for the sudo password.Type the password and hit Enter.
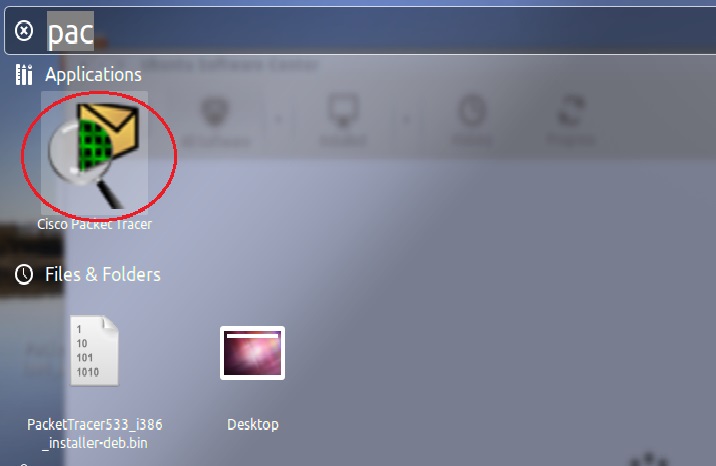
When the installation is finished, close the terminal,go to Dashboard, if packet tracer is not seen,type ‘pac’ in the search box. When Packet Tracer is shown, click on it.
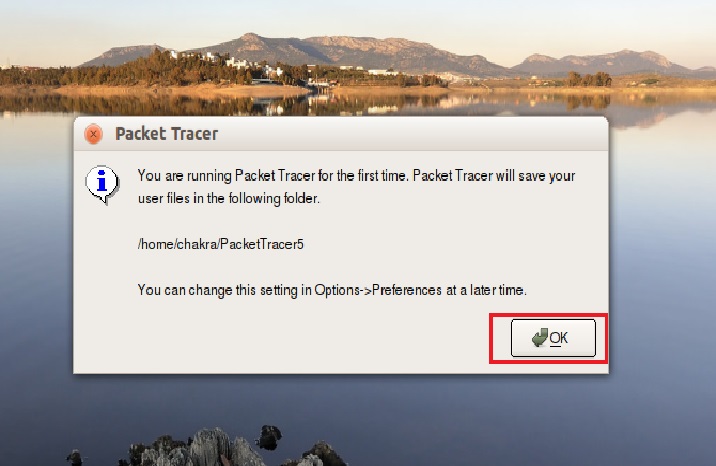
A messagebox shows up saying that we are starting packet tracer for the first time and our files will be stored in a specific folder. folder root will be shown in this pop up messege. Click OK.
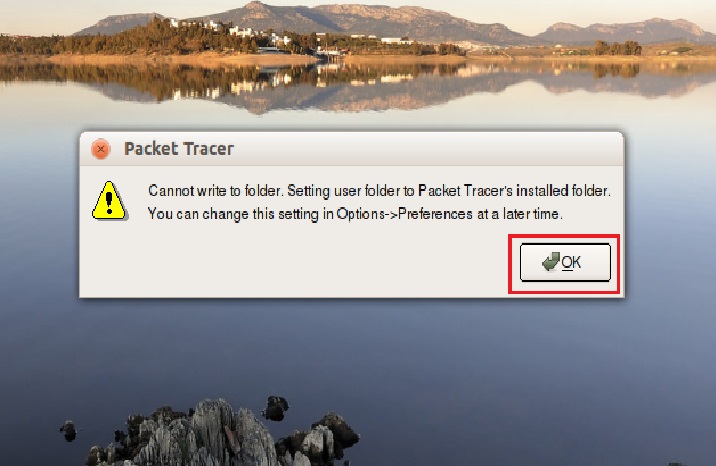
Another message box will pops up don’t mind Click on OK.
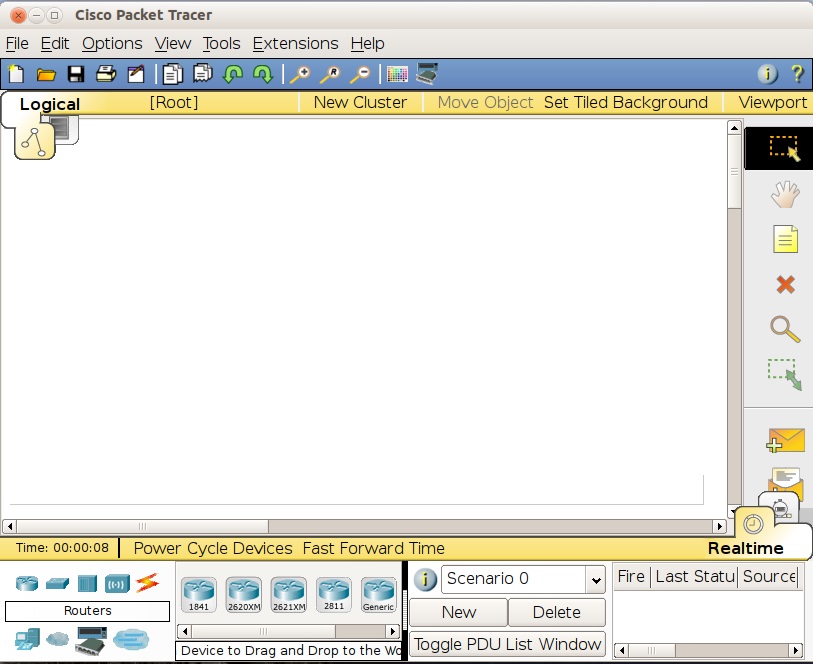
Packet tracer is started successfully
Thanks, If you like this tutorial please share this article to your friends in FB, Twitter,
Related Posts


About The Author
AYYU
I am a blogger since 2010 and I’m the author of this website I'm a systems/network administrator and I enjoy solving complex problems and learning as much as I can about new technologies. I write tutorials based on my work experience and other IT stuff I find interesting. since 2006 in online world also I am a troubleshooter for the well-known website like http://www.fixya.com and many more groups