
Windows 7 Enabling Telnet Client
Telnet Client allows a computer to connect to a remote Telnet server and run applications on that server. Once logged on, a user is given a command prompt that can be used as if it had been opened locally on the Telnet server’s console. Commands that you type at the Telnet client command prompt are sent to the Telnet Server and executed there, as though you were locally logged on to a command prompt session at the server. Output from the commands that you run are sent back to the Telnet client where they are displayed for you to view.
When you first try to run a telnet command, Windows will informs you that telnet is not recognized as a command

To enable Telnet Client on Windows 7, follow these steps :
- Click on Start
 then right click on Control Panel

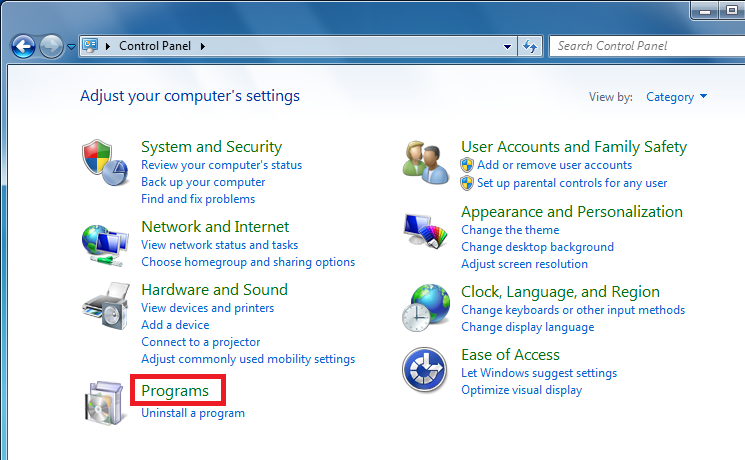
- From Control Panel, click on Programs
- Under Programs and Features, click on Turn Windows Features on or off

- From the Windows Features window, using the slider, scroll down till you reach Telnet Client, select the checkbox beside it, then click on OK

The selected feature will be installed.

Once it is installed, the Windows Features windows will be closed. - To confirm that Telnet is installed, open command prompt and type telnet /?

Summary
By default, Telnet Client is not enabled in Windows 7. To enable it, you have to add the Telnet Client Windows Feature.
References
This article is ported from the ElMajdal.Net website :
http://elmajdal.net/Win7/Enabling_Telnet_Client_in_Windows_7.aspx
Thanks, If you like this tutorial please share this article to your friends in FB, Twitter,
Related Posts


About The Author
AYYU
I am a blogger since 2010 and I’m the author of this website I'm a systems/network administrator and I enjoy solving complex problems and learning as much as I can about new technologies. I write tutorials based on my work experience and other IT stuff I find interesting. since 2006 in online world also I am a troubleshooter for the well-known website like http://www.fixya.com and many more groups